Monday, August 2, 2010

CSA Meal #1-Ricotta Stuffed Peppers

So we started getting deliveries from a fabulous farm up in Yolo County. I have a great affection for Yolo, having spent 7 years in Davis. The folks who run the farm are second generation farmers and second generation UC Davis grads, so yay!

I can tell already that something this Community Supported Agriculture (CSA) thing is going to do is get us thinking more creatively about our food. As part of the first box, we got an enormous bag of smallish yellow peppers, not bells, more like the tapered Italian kind. Also, a bunch of purple basil and a huge-ish musk mellon. Among other things, but this is what I'm dealing with currently.

So what to do with these little guys? The answer was Grilled Peppers with Herbed Ricotta.

For fresh ricotta, I used Michael Chiarello's recipe which is basically this: 1 gallon of whole milk, 1 quart of buttermilk, mix and cook over medium high heat, stirring and scraping the bottom so it doesn't burn, until the curds separate from the whey. Then remove it from heat, ladle the curds into a cheesecloth lined strainer to drain, and let it sit there for like 20 minutes. This makes about 4 cups of cheese.

Here is what it looks like draining.


And here's what it looks like done. Kind of like really small curd cottage cheese.


So I took the peppers, cut off the tops and pulled out the seeds, and rubbed them with olive oil. Here they are being prepared to grill.


Then I grilled them over medium high heat until they were a little blistery and soft, but still held their shape.

I mixed minced garlic, fresh chopped basil, kosher salt and dried Italian herbs into the ricotta until it looked nice and herby. This is really up to you. I used 1 tsp each of minced garlic, fresh basil, and dried herbs for 1 cup of ricotta, and about 3 biggish pinches of kosher salt. Taste as you go. Here is the herby cheese.


When the peppers were done and still hot, I spooned the cheese mixture into them. That's it. Here they are. YUM.


I served them with half the musk mellon cut into slices and wrapped in prosciutto. It was delicious and super easy. The hardest part was making the cheese, and that wasn't really hard, it just took a little while (about 30 minutes to cook). Ta da!

Sunday, July 25, 2010

Smock #2--Embroidery

So I'm the worst costume blogger ever, since I never post pictures or descriptions of the finished projects. One day, I'm just going to have J. take pictures of every finished piece of costume I've made and post them all in one fell swoop.

Until then, next project!

I'm making another high necked smock for this season. I only had the one last year, plus the low necked smocks I'd made years ago. They work fine, but the high necked one is easier since I don't have to wear a partlet with it. But only wearing one smock per weekend is G-R-O-S-S, especially early in the season when it is still hotter than two rats getting it on in a wool sock. Plus, an excuse for more pretty period embroidery!

This smock is based on a late-period one detailed on page 119 of Janet Arnold's Patterns of Fashion 4 (the color photos are on page 62). The shape, anyway. The embroidery pattern is my own, based on popular flowers and fruits during Elizabeth's reign--roses, pomegranates, and carnations (or pinks). I'm only embroidering the sleeves.

Here the sleeve pieces. They will be joined at the top seam with a knotted insertion stitch. I want to use this one, but I have to wait for my copy of the book it's from to get here. Sigh.


The embroidery is done with a medium terra cotta colored floss to give the feel of the pink embroidery of the original without being PINK. The pieces have been hemmed, but not ironed, and the copy lines need to be cleaned up, obviously.


So until my book comes, I'll be doing the rest of the smock--cutting and hemming the side gores, underarm gussets, neck gussets and collar, and sewing most of it together. Sleeves will go on last I guess, once my book comes and I can figure out my stitch.

Monday, July 5, 2010

And now, a detour from costuming

I've been asked several times over the last couple of days for the recipe I use for Carolina-style barbeque pork. Because I love you all, here it is. Just don't bring it to any potlucks we'll both be attending without checking with me first. Ha!

Ok, so after a little research I discovered that this is Lexington or Western North Carolina style barbeque. A couple of things make it so: it's done with pork shoulder, not a whole pig, and the sauce has a little bit of ketchup in it. Apparently, true Eastern North Carolina barbecue is done with a whole pig and there is NO ketchup in the sauce. But, I'm a westerner, so Western style it is.

Take your pork shoulder (pork loin will NOT work-it is too lean. You want all the fat and connective tissue). It doesn't matter how big it is, just keep in mind that you're going to cook it for 1 to 1 1/2 hours per pound. It also doesn't matter if it's boneless or not. Leave the fat cap on. Cover it in your favorite dry rub. Here is the one I use, from Steven Raichlen's Barbeque Bible. Some people don't really use a rub, just salt and pepper. Do what you like. Let your shoulder sit to absorb the rub flavors for 1-24 hours. I have never waited 24 hours because I rarely plan that far in advance.


When you're ready to cook, figure out how long you're going to need. Your going to be cooking this at a low temperature for a long time. You'll need 1 to 1 1/2 hours per pound of meat. This piece of meat is 3.68 lbs and I'm cooking it for about 5 hours at 275-300 degrees. I do mine on a gas grill. You can use a charcoal grill, or the oven if you don't have a grill. The oven won't give you the smoke flavor or the classic red layer directly under the crust, but it's still yummy.

Preheat your grill and get your wood chips smoking. I heat the grill on high, all three burners, with wood chips in a drip pan in the back corner covered by another drip pan. When the wood chips are smoking, turn the front and back burners to low and the middle one off, or set up the grill for however you do indirect cooking at 275-300 degrees. Put your shoulder on the cool part of the grill, or in the oven, fat cap up. Close the grill. Don't touch it for at least an hour. When your wood chips stop smoking, add more.

When about half your estimated cooking time has passed, start adding some moisture with a mop sauce. The easiest mop sauce is half cider vinegar, half water or broth. Sometimes I add crushed red pepper flakes or sliced onion, but often I just go with vinegar and water (this is better than some other uses for vinegar and water!). Baste your shoulder with mop sauce generously every hour or so. Keep your wood chips smoking.


When your shoulder has reached an internal temperature of 190-200 degrees, it's ready. It will look all black and crispy on the outside. Take it off the grill and let it sit for 15 minutes or so. Then just pull it apart. It will be SUPER HOT so use two forks or use latex gloves and work fast. The shoulder should just fall apart. If it doesn't, you can put it in the oven for longer until it does.


After you pull it apart, or chop it if you prefer, add your sauce. Carolina-style sauce is thin and vinegar based. The recipe I use is: 2 cups of cider vinegar, 3 tbs ketchup, 2 tbs brown sugar, 4 tsp coarse salt, 1 tbs hot sauce, 1-2 tsp red pepper flakes, 1-2 tsp ground black pepper. Again, courtesy of Steven Raichlen and his fantastic bbq books. Add enough of the sauce to the shredded or chopped pork to season it and keep it moist.

Serve this with cole slaw and hush puppies, or on a white bun with cole slaw piled on top. I like it with traditional creamy cole slaw, Jonathan likes it with cole slaw made by adding more of the vinegar sauce to the shredded cabbage. Either way it is YUM.

Here's what it looks like done, with my first attempt at hush puppies.


If anyone from any part of Carolina has an issue with any of this, feel free to tell me, but please be nice about it. I'm a California girl and there's a reason I'm calling it Carolina-STYLE barbeque. I know y'all can be touchy about your 'que. Enjoy!

Sunday, April 18, 2010

Magic Darts

So being someone who does very little sewing of modern clothes, my dart knowledge is very minimal. 16th Century clothes don't use them at all and mid-to-late 19th Century clothes only use them at the waist, so the whole bust dart concept isn't one that I've really worked with.

When faced with the gaping armscye on the Dior dress, I had a vague idea that I could take a dart there and then shift the extra fabric into another dart. Did I have any idea of how to do this in real life? No, I did not. Threads magazine to the rescue!

For Christmas, the Husband gave me the complete set of Threads fitting dvds. I can tell right now, I'm going to get so much use out of these. The DVD made it perfectly clear how to shift the fabric from my dart to the existing bust dart. I took the dart in the muslin and marked it with a pen so that it looks like this:


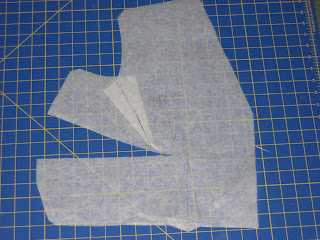
Then I transfered the markings to the pattern, cut the dart, and taped it closed along the dart lines so the pattern curved from the dart. Then, I cut down the center line of the existing bust dart to release the tension, open up that dart, and get a smooth pattern piece again.

Et voila!


The fact that you can tranfer the extra fabric into ANY dart is going to mean good things for my Victorian fitting too. Hurray for darts!

Sunday, April 11, 2010

I Don't Think This Is What M. Dior Had In Mind

So, the first muslin of the bodice of the New Look dress. Where to begin. How 'bout with:

Ahahahahahahahahahahahahahahahahahahahahahahahahahahah

*gasp*

Hahahahahahahahahahahahahahahahahhahahahahahahahahhaha

Ok. Here's a photo of the first muslin. Let's look at the areas that could use some, shall we say, improvement.


In this photo, the shoulder seam is in approximately the correct position, as is the bottom of the back. Note the placement of the bust. See that lumpy section about halfway up my chest? Yeah, that's where the bust darts are. See the slight curve of black right between my chubby tummy and the muslin? Yeah, that's my actual bustline. And let's not even talk yet about the gapping at the armscye.

So here's the same muslin with the bust shifted to the correct position. Note the placement of the shoulder seam and the way the back rides up. Fix needed: Increase length of "strap" in the front.


Here is muslin #2 with the front adjusted.


To adjust the front, I cut the pattern piece across from the armscye to the neck and added two inches (I measured the distance from the actual position of the shoulder seam when the bust was in the correct place to the position where the shoulder seam should be). Then I corrected the curve on the arm.

As you can see, there are still issues to be addressed. The armscye still gaps and will need to be adjusted. I'm still figuring out how to shift the extra fabric into the side dart. Also, the shoulder is much too wide. This is supposed to be a sleeveless bodice with the edge of the shoulder hitting right at my true shoulder point. You can also see that the back is riding a bit high, even though the shoulder seam is in the correct place, and the armscye in the back is a bit tight. I think this can be corrected by adding a bit to the back of the shoulder as well.

Next up: fitting the armscye, bust, and back length.

Dioresque

So I'm officially the worst blogger ever. No new posts in 9 months? What the hell? It's not like I didn't do any sewing or costuming. Just no blogging. I suck.

Anyway. New endeavor. Summer dress inspired by Dior's New Look.

For those of you who don't know, in 1947 Christian Dior introduced his Corolle collection. After years of rationing and war-time starkness and thrift, Dior brought femininity and luxury back with one fell swoop. His new collection, inspired by the clothing of the Belle Epoque according to M. Dior, was all nipped in waists and padded hips and beautiful fabric--lots of it. It was coined the "New Look" by Harper's Bizarre.

This dinner dress from Spring/Summer 1947, called "Cherie", is typical of the New Look (photo from the Metropolitan Museum of Art)


My dress is inspired by Dior's New Look and drafted initially on my Wild Ginger PatternMaster Boutique pattern drafting software. It's the first thing I've drafted with it, so it's sort of my test. Needless to say, the measurements I entered need some, um, adjustment.

The dress will hopefully turn out looking something like this:

For the fabric I've chosen a white cotton lawn printed with blue flowers. I wanted something light, summery, drapey and feminine. Since the fabric is very sheer, I'll be lining it with cotton the same blue as the flowers. The fabric is here:


My goal is to have this done by May 8 when the Husband and I are celebrating our 10th anniversary.

Next up, fitting the bodice. Yikes!

Tuesday, July 14, 2009

I Lose at Posting

I'm so focused on getting the stuff done that I'm being really bad about photographing and posting my progress. The linen kirtle is pretty much finished. I just need to bind the armholes.


Ignore the weirdness as the waist point. I've fixed that since this photo was taken.

The kirtle made of vineyard green linen from fabrics-store.com, and is sewn entirely by hand using period techniques. There's very little evidence of middling types of women wearing separate boned bodies until at least late in the 16th century, so my original plan was to stiffen the bodice of the kirtle itself with hemp cord. I changed my mind, though, and decided to make a separate pair of bodies stiffened with reed, thinking it would be a bit more versatile. Here's a photo of the bodies.


The bodies are made of a linen/cotton blend canvas that I got on sale 'cause it's such a blech dust color. They're boned with teeeeeeeeeny little reeds I got from Reconstructing History. They're essentially broom straw. They come coiled up in a huge bunch, and are an enormous pain in the patoot to try and cut down to usable lengths. I machine sewed the boning channels at about 1/4 inch, then filled each channel with 8 lengths of reed. As you can see, it looks pretty cool when it's finished. They're bound with just regular old bias tape in a shocking shade of tangerine. The binding is sewn on by hand. The lacing eyelets are also done by hand in a matching shade of tangerine. The bodies are spiral laced.

The kirtle itself was draped by my fabulous guildmistress and partner in costuming crime, Valerie. The bodice is lined in a light green linen I picked up somewhere for another purpose altogether, which I have now forgotten. The lining and the outside fabric of each individual bodice piece are sewn to each other by turning in and pressing the seam allowances, then edge stitching the pieces. The backs and the front are then whipstitched to each other at the side and shoulder seams as seen here:


Outside of seam


Inside of seam

The back of the kirtle is boned with cable ties for a little extra stiffness along the lacing edges. The eyelets are handbound and arranged so the kirtle is spiral laced.

The skirt is two lengths of the same green linen, each hemmed on the selvedge then whipstiched together. It is pleated and whipstitched directly to the bodice with single knife pleats at the side-fronts and double knife pleats in the back. It's about 110 inches around.

Next up is the wool overgown. I'll try to be better about posting the progress photos and descriptions!